How to Treat Osmosis on a Boat ?
Boat osmosis is a serious, often concealed structural issue affecting polyester fiberglass hulls. This chemical process creates damaging blisters that compromise laminate integrity and devalue the vessel. Early detection and decisive action are essential. Immediate intervention prevents minor issues from escalating into complex, costly repairs.
This article provides a complete, actionable guide to managing this threat. Learn to identify, understand, and prevent osmosis, along with a detailed, professional-grade repair strategy.
Understanding Boat Osmosis: Definition & Mechanism
What is Osmosis in a Boat Hull?
Osmosis is a physico-chemical degradation process affecting the Glass Reinforced Plastic (GRP), or fiberglass, hull laminate. It is the result of water permeating the external layers and reacting with soluble materials trapped inside the laminate. This creates a concentrated solution which, through osmotic pressure, draws in more water, leading to the formation of blisters.
The Role of Gelcoat and Fiberglass Laminate
The boat’s outer surface is protected by the gelcoat, a layer of pigmented resin designed to be an initial barrier to water ingress. However, the gelcoat is considered a semi-permeable membrane, allowing water molecules to slowly diffuse through it over time.
Beneath the gelcoat lies the fiberglass laminate, composed of polyester resin and glass fibers. The resin matrix often contains micro-voids, air pockets, or uncured components left from the manufacturing process. These imperfections are where the water collects and the destructive process begins.
The Chemical Process: Water + Resin + Pressure = Blisters
- Water Ingress: Water molecules slowly pass through the slightly porous gelcoat and into the laminate.
- Hydrolysis: The water chemically reacts with water-soluble materials (such as uncured resins or manufacturing byproducts) trapped in the micro-voids. This reaction is called hydrolysis.
- Concentration Gradient: Hydrolysis produces concentrated, highly acidic liquids (often containing acetic acid or glycol). This high concentration inside the void creates an osmotic gradient relative to the lower concentration of water outside.
- Osmotic Pressure: Driven by osmosis, the hull actively draws more water through the gelcoat barrier to equalize this concentration. This continuous influx of water generates significant hydrostatic pressure within the void, which eventually exceeds the strength of the surrounding laminate.
- Blister Formation: This internal pressure forces the gelcoat and outer laminate layers apart, manifesting as the characteristic dome-shaped blisters on the hull surface. When punctured, these blisters often release a fluid with a distinct vinegar-like odor, confirming the acidic chemical reaction.
Consequences: Degradation and Loss of Integrity
If left untreated, the consequences of osmosis move beyond cosmetic damage:
- Blistering and Cracks: The most visible sign, ranging from pinpricks to palm-sized domes.
- Delamination: The pressure and chemical action can dissolve the bond between the resin and the glass fibers, causing the laminate layers to physically separate.
- Loss of Structural Integrity: Severe, deep, and extensive delamination compromises the hull’s mechanical strength. This reduces the vessel’s durability and can affect the load-bearing capabilities of critical areas.
- Reduced Resale Value: The presence of osmosis, regardless of severity, substantially decreases the boat’s marketability and price.
What Causes Osmosis in Boats?
Osmosis is not an instantaneous failure but a progressive reaction driven by a combination of material quality, manufacturing technique, and the boat’s operating environment. The fundamental cause is the presence of water-soluble contaminants trapped within the fiberglass laminate.
Environmental Factors
- Long-Term Water Exposure: The primary prerequisite for osmosis is continuous immersion. The longer a hull remains in the water, the more time water molecules have to diffuse through the gelcoat barrier.
- Freshwater vs. Saltwater: Freshwater is generally more aggressive than saltwater. Because freshwater has a lower concentration of solutes, it intensifies the osmotic gradient. This drives water into the laminate more quickly to balance the higher solute concentration within the voids.
- Heat (Temperature): Warm water and high ambient temperatures significantly accelerate the chemical reaction (hydrolysis) within the laminate. This speeds up the creation of the acidic, water-attracting solutions that form the blisters.
Manufacturing and Material Defects
The presence of the trapped, water-soluble material is often traced back to the original construction.
- Poor-Quality or Improperly Applied Materials: Use of lower-grade, non-hydrolysis-resistant polyester resins (such as Orthophthalic resin) can increase susceptibility. Additionally, incorrect resin-catalyst ratios can leave uncured, soluble components in the laminate.
- Manufacturing Defects (Voids): Imperfect construction creates the necessary pockets for water to collect:
- Air Bubbles: Small air pockets left between laminate layers.
- Dry Fiberglass: Areas where the glass mat was not fully “wetted out” or saturated with resin, leaving exposed, hydroscopic fiber binders.
- Contaminants: The inclusion of foreign particles or dust during the layup process.
- Gelcoat Integrity: The gelcoat’s function as a barrier is paramount. If the gelcoat is too thin or has been mechanically damaged (e.g., from grounding or poor sanding), the diffusion path for water is drastically shortened.
Maintenance and Prevention
- Lack of Proper Preventive Treatment: Hulls without an effective epoxy moisture barrier coat—especially older vessels built before the widespread adoption of high-performance resins—lack the crucial secondary defense layer against water permeation.
- Improper Repairs: Repairing existing hull damage or blisters without fully drying out the laminate or adequately removing the acidic contents can seal moisture and contaminants inside. This accelerates the problem beneath the new patch.
How to Detect Osmosis on a Boat?
Detecting osmosis early is crucial for limiting the scope and cost of repairs.1 The process involves both visual and technical inspection, ideally performed when the boat has been hauled out and the hull has had some time to dry.2
Common Signs and Symptoms (Visual & Olfactory)
| Sign | Description | Potential Severity |
| Blisters (The most common sign) | Small, raised bumps on the gelcoat, varying in size from a pinhead to a coin. | Varies: Small, dry, or clear-fluid blisters are often superficial (gelcoat only). Larger, dense, or deep blisters may indicate structural compromise. |
| “Blister Juice” | When a blister is carefully punctured, the fluid released often has a distinctive, pungent, vinegar-like or sickly-sweet smell and may be greasy or sticky. This confirms the presence of acidic byproducts from the chemical reaction (hydrolysis). | High: Confirms the active chemical process of osmosis is occurring in the laminate. |
| Discoloration | Visible dark or cloudy patches on the gelcoat, often in a systematic or patterned way. | Moderate: Can indicate water saturation or breakdown of the resin underneath. |
| Soft or “Spongy” Areas | Pressing on the hull can reveal areas that feel unnaturally soft or weak, particularly around fittings or the keel stub. | High: Indicates advanced moisture penetration and potential laminate delamination (separation of the fiberglass layers). |
Detection Methods and Tools
These methods are used by marine professionals to confirm the presence and extent of the problem:
- Visual Inspection + Light Sanding:
- Method: The boat is first lifted, and the bottom is scrubbed clean. A detailed visual inspection is performed. Often, a professional will lightly sand a few suspect areas or burst a few blisters to inspect the contents and the underlying laminate.
- Goal: Identify the quantity, size, and fluid content of any blisters.
- Acoustic Sounding (Tapping Test):
- Method: Tapping the hull surface with a plastic or phenolic hammer (or even a coin) to listen for variations in sound.
- Goal: A dry, solid laminate will produce a sharp, clear sound, while areas with delamination or significant voids will produce a dull, dead, or “thudding” sound.
- Moisture Meter for Accurate Humidity Readings:
- Tool: A non-destructive, radio-frequency or capacitance moisture meter (e.g., Tramex Skipper).3
- Method: The meter is passed over the entire hull, reading the relative moisture content in the fiberglass laminate.4 Readings are compared to a “dry” baseline, usually taken from the topsides (above the waterline).5
- Goal: Identify areas of abnormally high moisture content before blisters become visible.6 It helps map the extent of the problem and track the drying process during repair.
- Note: A moisture meter reading alone is not a definitive diagnosis of osmosis, as paint, metal, or surface condensation can affect the reading.7 It is a critical guide used in conjunction with visual and tapping tests.
- UV Lamp or Flashlight Test:
- Method: A bright light source (often a powerful flashlight) is run across the hull’s surface at a shallow angle.
- Goal: This technique highlights small, subtle irregularities, shallow blisters, and the outline of moisture patches that are often invisible under normal lighting.
Step-by-Step Osmosis Repair Guide
Osmosis repair is a long, meticulous, but highly effective process to restore the structural integrity and value of your fiberglass hull.
Worksite Preparation
- Haul the boat out of the water: The hull must be completely exposed.
- Washing & Cleaning: Immediately after hauling, pressure wash the hull to remove all mud, salt, and marine growth.
- Protect the workspace and yourself: Osmosis repair generates significant dust and deals with chemicals.
- PPE (Personal Protective Equipment): Always wear gloves, goggles, a respirator/mask (P100 or better for grinding dust), and protective clothing.
- Containment: Set up a tarp or plastic sheeting to catch all sanding and blasting debris, which can contain toxic elements from old antifouling.
Step 1: Gelcoat Removal & Drying
The goal is to remove the non-waterproof gelcoat and expose the wet laminate underneath.
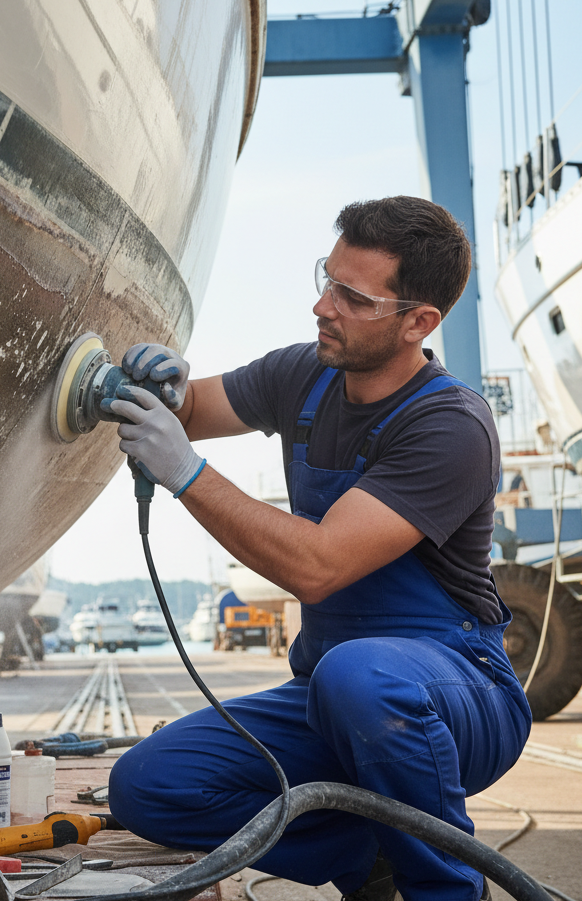
- Removal Method: Use specialized equipment like a gelcoat peeler for precise removal, or employ media blasting (soda or crushed glass) or hydro-blasting. Sanding is also an option but is much more laborious for a full hull job.
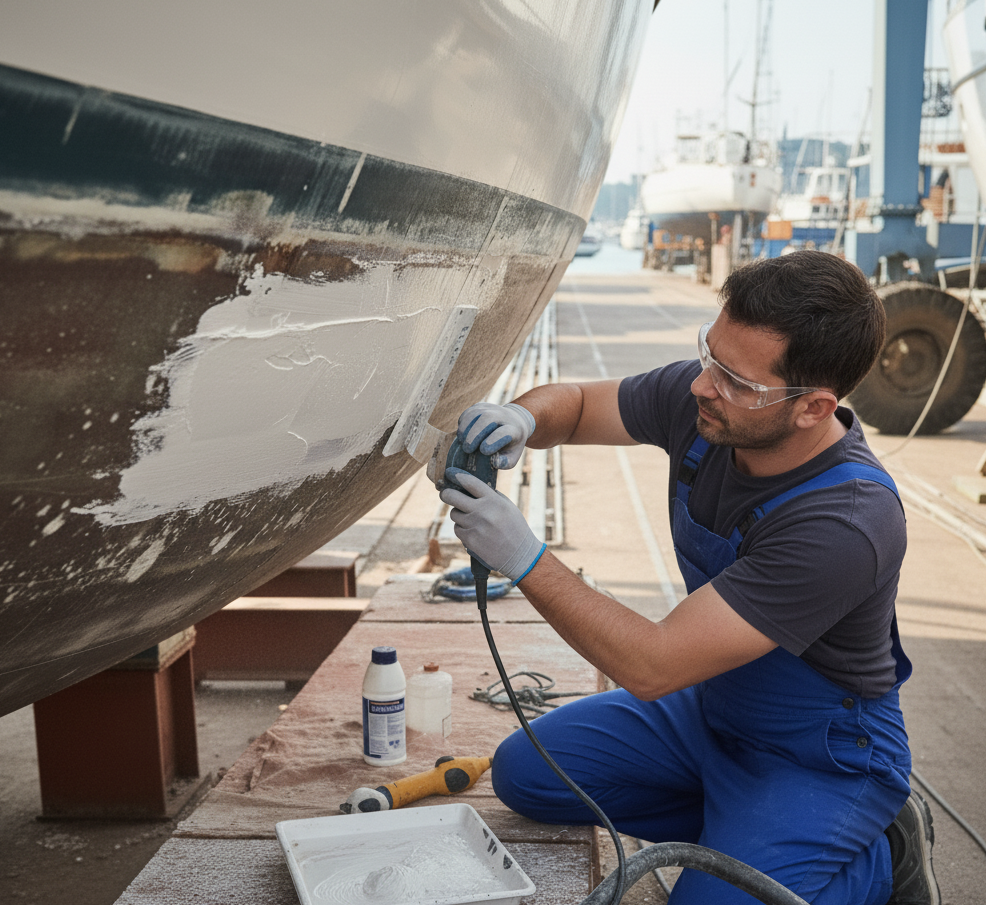
- Blister Treatment: Open any remaining blisters and use a grinder (like a Dremel) to scallop the affected areas down to solid, dry laminate.
- Washing: The exposed hull should be thoroughly hot-washed daily for several days with fresh water to flush out the water-soluble chemical contaminants (the “blister juice”).
- Allow Full Drying Time: This is the most critical and time-consuming step. The hull must be allowed to dry completely until moisture meter readings return to a stable low baseline (usually for several weeks or an entire winter). Use a dry, well-ventilated area. Dehumidifiers and specialized heaters (HotVacs/Infrared) can significantly accelerate this process.
Step 2: Laminate Repair (Filling & Fairing)
Once the hull is fully dry, the surface needs to be made smooth again.
- Cleaning: Thoroughly clean and degrease the surface using a solvent like acetone or a marine-safe BioSafe cleaner to ensure optimal adhesion.
- Apply Epoxy Filler or Putty: Use a high-quality, two-part epoxy filler/fairing compound (e.g., Watertite, Resoltech, West System with fairing additives) to fill the scalloped areas and any voids left by the gelcoat removal.
- DIY Budget Tip: You can make your own fairing compound by mixing high-quality epoxy resin with lightweight filler powders like red microballoons (phenol microballoons) or colloidal silica until it reaches a peanut butter-like consistency.
- Sanding & Fairing: Sand the cured filler smooth to achieve the desired hull shape. The goal is a perfectly fair surface.

Step 3: Fiberglass Reinforcement (if needed)
For deep voids or areas of delamination, a structural patch may be required.
- Structural Patch: Apply a layer of fiberglass cloth or mat saturated with a solvent-free epoxy resin.
- De-bubble: Use a bubble roller to consolidate the fiberglass and resin, ensuring the cloth is fully saturated and no air is trapped.
- Use Peel Ply: Applying a layer of Peel Ply fabric over the wet epoxy/fiberglass laminate. When cured, you peel it away, leaving a perfectly textured surface that eliminates the need for sanding between coats or before barrier application.
Step 4: Epoxy Barrier Coating
This is the new, impermeable layer that replaces the old, leaky gelcoat.
- Application: Apply the first coat of a dedicated, moisture-resistant epoxy barrier coat (e.g., Gelshield International, Interprotect).
- Layer Count: Apply at least two to five coats (following the manufacturer’s directions) for a truly effective vapor barrier.
- Respect Overcoat Times: Crucially, respect the “chemical window” (overcoat time) specified by the manufacturer. Applying the next coat within this window ensures the chemical bond is stronger than a mechanical bond achieved by sanding.
Step 5: Final Antifouling
The final step is protecting the new barrier coat.
- Surface Preparation: Light sanding of the final epoxy coat may be required, depending on the overcoat time and barrier coat manufacturer’s instructions.
- Primer (Optional): Many modern epoxy barrier coats are designed to be coated directly with antifouling paint.
- Antifouling Application: Apply at least two coats of your chosen antifouling paint.
- Choice: Choose between self-polishing (ablative) antifouling (wears away over time, good for all boats) or hard matrix antifouling (durable, good for fast boats or dry-sailed boats).
- Tip: Some specific antifouling products (like certain Yachtcare lines) may be marketed as not requiring a separate primer coat over the barrier, but always check compatibility with the epoxy barrier system you used.
Preventing Osmosis: Long-Term Protection Tips
Prevention is always less expensive and time-consuming than repair. Implementing a proactive maintenance strategy can greatly reduce the risk of osmosis in a fiberglass hull.
- Annual Hull Inspection:
- Routine: Conduct a detailed visual and tactile inspection (tapping test) of the hull every time the boat is hauled out.
- Moisture Check: Consider using a moisture meter annually to track baseline readings and identify any developing “hot spots” early, allowing for localized treatment before widespread blistering occurs.
- Full Preventive Epoxy Barrier:
- Proactive Coating: Even without visible blisters, applying a complete, multi-coat epoxy barrier system (e.g., five to seven coats of a high-solids epoxy primer) can provide an excellent layer of moisture defense.
- Schedule: This comprehensive treatment is often recommended every 10 to 15 years, particularly for boats permanently kept in the water.
- Clean and Dry the Hull Regularly:
- Cleaning: Regular pressure washing of the bottom can help prevent marine growth from compromising the antifouling and gelcoat.
- Drying: When hauling out for extended periods, ensure the hull is thoroughly dried before applying any new coatings.
- Ensure Proper Ventilation:
- Interior: Water ingress and condensation from inside the boat can contribute to hull moisture. Use dehumidifiers and good air circulation (fans, vents) to keep the bilge and interior spaces dry, especially during winter storage.
- Don’t Overwinter the Boat in Water:
- Haul Out: If possible, haul the boat out of the water for the winter season. This allows the hull to dry out naturally and significantly reduces the total time the laminate is saturated.
- Use High-Quality Antifouling Paint:
- Protection: Select a reputable brand and type of antifouling paint compatible with your barrier coat or gelcoat. While antifouling does not prevent osmosis, it protects the underlying barrier and minimizes growth that can trap moisture against the hull.
Should You Always Hire a Professional?
Here is a shorter comparison of the pros and cons of professional versus DIY osmosis repair.
DIY vs. Professional: A Quick Comparison
| Feature | Professional Repair | DIY Repair |
| Primary Advantage | Guaranteed, high-quality result that maintains hull value. | Significantly lower material costs (saves on labor). |
| Cost | Expensive | Inexpensive (primarily materials + tool rental). |
| Time | Fast turnaround (weeks/months) using specialized drying gear (Hot Vac). | Slow. Drying can take an entire winter season or longer. |
| Expertise | Uses calibrated moisture meters, peelers, and offers a warranty. | Requires a high level of skill, patience, and attention to detail. |
| Best For | Widespread blistering, delamination, and high-value yachts. | Small, localized blisters or when the boat’s value is low. |
| Key Risk | High upfront cost. | Risk of failure (sealing in moisture) and lower resale value. |
When to Go Professional
- Your boat is a high-value asset where resale price is crucial.
- A marine surveyor has confirmed delamination or widespread, deep-seated osmosis.
- You lack the time, space, or specialized tools (peeler, hot vac, calibrated meter) needed for a multi-month repair process.
When DIY is Feasible
- You only have a few, small, isolated blisters (patch repair).
- Your boat has a low market value, and you are willing to accept the risk of a non-professional finish.
- You have ample time (several months) and a dry workspace to allow for proper drying.
Conclusion
Osmosis is a significant, but treatable, condition for fiberglass boats. A successful repair depends on a patient, methodical approach that prioritizes the complete removal of the affected gelcoat and, most critically, thoroughly drying the hull to safe moisture levels. Whether you opt for a time-saving, guaranteed professional cure or a cost-effective, time-intensive DIY repair, sealing the hull with a high-quality, multi-layer epoxy barrier coat is the final essential step to protect your investment and ensure many more years of problem-free sailing.