
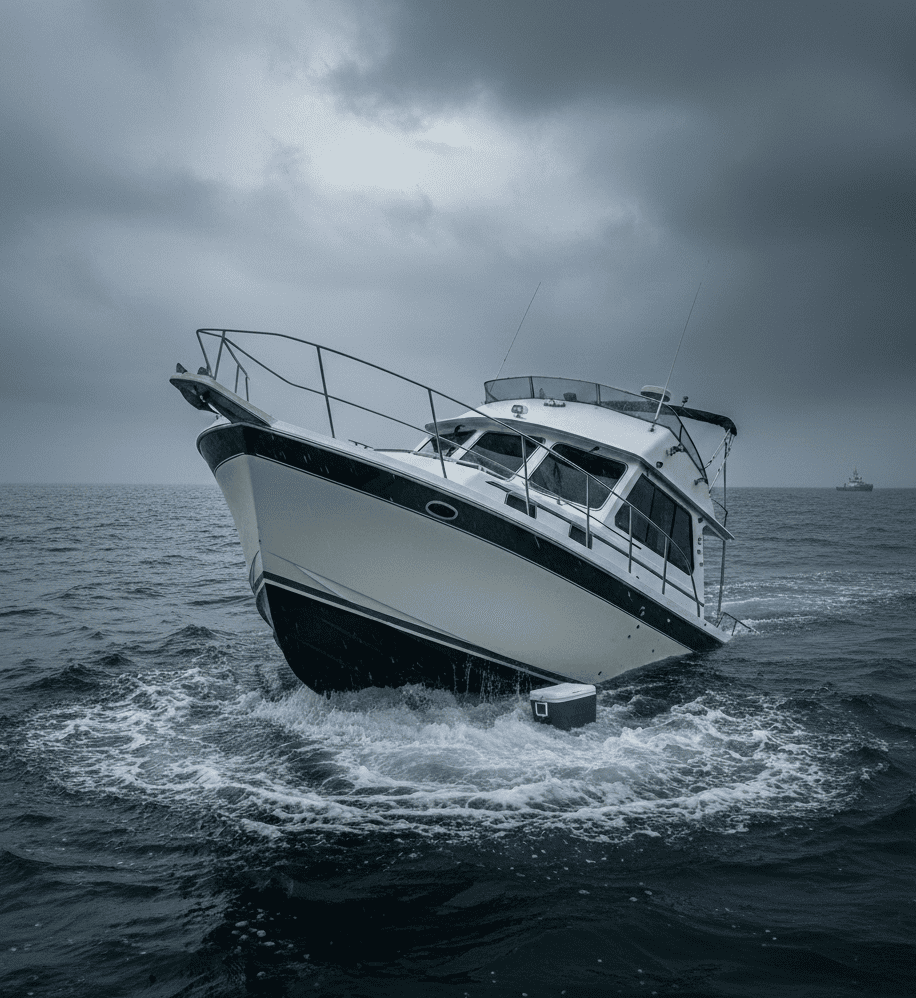
How to Handle a Hull Breach at Sea
The peace of a voyage is shattered the moment you find floorboards floating. A hull breach at sea—any structural failure allowing water ingress—is a race against physics. Every minute matters as rising water threatens your electronics and stability. This guide provides clear, actionable steps for recreational boaters and offshore cruisers to locate the leak, stabilize the vessel, and protect the crew during a maritime emergency.
What Is a Hull Breach?
To effectively manage an emergency, you must first understand exactly what you are fighting. Not every drop of water in the bilge is a crisis, but knowing when a situation has shifted from “nuisance” to “emergency” is critical for survival.
Definition in Maritime Terms
In maritime terms, a hull breach refers to any opening in the vessel’s “envelope”—the hull, deck, or integrated fittings—that allows uncontrolled water to enter. It represents a failure of the primary boundary between the interior of your boat and the ocean.
Normal Bilge Water vs. Dangerous Water Ingress
Most vessels experience a small amount of water in the bilge due to condensation, rainwater, or minor drips from a stuffing box.
- Normal Bilge Water: Managed easily by an occasional cycle of the automatic bilge pump.
- Dangerous Water Ingress: Occurs when the volume of incoming water exceeds the capacity of your pumps, or when the source is unknown and the water level continues to rise rapidly toward the cabin sole or electrical components.
Most Common Causes
Understanding the causes of hull breach boat failures allows for a faster search when time is limited. Common culprits include:
- Collision: Striking a floating object like a shipping container, a log, or another vessel.
- Grounding: Hitting rocks, reefs, or sandbars, which can tear the laminate or dislodge the keel.
- Failed Through-Hull Fitting: The failure of a seacock, valve, or the hose connected to it.
- Damaged Shaft Seal: A leak where the propeller shaft exits the hull (the stuffing box or dripless seal).
- Cracked Hull: Structural failure due to extreme stress, manufacturing defects, or age.
- Rudder Post Leakage: Impact on the rudder can damage the bearing or the tube it sits in, leading to significant flooding.
Immediate Actions: First 5 Critical Steps
When you realize you are taking on water, the first few minutes determine the fate of the vessel. Follow this high-priority sequence to gain control before the situation escalates.
Stay Calm and Assess
Panic is a contagion that leads to poor decision-making. As the skipper, take five seconds to breathe and observe. Note the water’s rate of rise against a fixed point in the bilge. Knowing if you have ten minutes or two hours to solve the problem will dictate your level of aggression in the repair.
Locate the Source of Water
You cannot fix what you cannot find. Start at the most likely failure points:
- Engine Compartment: Check raw water intake hoses and the shaft seal.
- Through-Hulls: Inspect every seacock in the heads, galley, and bait wells.
- Transducers: Ensure depth sounder and speed logs haven’t been forced out of their housings.
- The “Fountain” Effect: Look for spraying water or listen for the hiss of air being trapped.
Activate Bilge Pumps Immediately
Do not wait for the automatic float switch to engage. Manually flip every electric bilge pump to the “ON” position. If you have a high-capacity emergency pump or a manual diaphragm pump, put them to work immediately. Moving water out must happen simultaneously with stopping it from coming in.
Reduce Speed or Stop if Necessary
Your movement through the water affects the pressure on the breach:
- Bow Breach: Slowing down or stopping reduces the “ram pressure” forcing water into the hole.
- Stern/Shaft Leak: Bringing the engine to neutral may stop a leak caused by a vibrating shaft or failed coupling.
- Heeling (Sailboats): If the leak is near the waterline, tacking or changing course to put the hole on the “high side” can lift the breach out of the water entirely.
Assign Roles to Crew
Don’t be a hero; be a manager. Clear, loud instructions prevent chaos:
- Crew Member A: Man the radio and prepare a distress draft.
- Crew Member B: Operate the manual pump or start bailing with buckets.
- Crew Member C: Gather life jackets and prepare the ditch bag/life raft.
How to Temporarily Stop the Leak
Once the source is identified, you must slow the flow. The goal isn’t a permanent fix—it’s to reduce water ingress to a level that your pumps can manage until you reach help.
Using Wooden Plugs for Through-Hulls
The most effective tool for a failed valve or broken hose is the tapered softwood plug.
- The Technique: Select a plug slightly larger than the hole, insert the narrow end, and drive it home with a hammer or the heel of your hand.
- Why Softwood? Unlike hard plastics, softwood absorbs water and swells, creating an increasingly tight seal that can withstand significant pressure.
Emergency Improvised Materials
If you don’t have a dedicated repair kit, look around the cabin. High-volume leaks can often be slowed with soft goods:
- Cushions and Pillows: For large hull tears, a settee cushion backed by a floorboard can be braced against the hole to create a “soft patch.”
- Rags and T-shirts: These are excellent for stuffing into narrow cracks or wrapping around leaking pipes.
- Softwood Wedges: Smaller than plugs, these can be driven into “smile” cracks or jagged tears in a fiberglass hull to bridge the gap.
Emergency Repair Kits
A well-prepared vessel should carry specialized materials for sub-surface repairs:
- Epoxy Putty: Look for “underwater” versions that can be kneaded together and applied directly to a wet hull. It hardens quickly, even while submerged.
- Underwater Repair Tape: Often called “rescue tape,” this silicone-based wrap fuses to itself. It is ideal for sealing a burst raw-water hose or a leaking shaft log.
- Collision Mat: This is a heavy-canvas or vinyl sheet with lines attached to the corners. It is dropped over the bow and pulled under the hull. The external water pressure forces the mat against the breach, effectively “capping” the leak from the outside.
Should You Send a Distress Call?
Knowing when to call mayday taking on water is a decision that must be made early. It is better to cancel a rescue than to call for one when it is too late.
When to Issue a MAYDAY
A MAYDAY signal is reserved for situations involving grave and imminent danger to the vessel or life. You should issue a Mayday if:
- The water level is rising and your pumps cannot keep up.
- The vessel is losing stability or starting to list.
- You are in danger of sinking or being forced to abandon ship.
When to Send a PAN-PAN
A PAN-PAN is used for urgent situations that are not yet life-threatening. Issue a Pan-Pan if:
- You have a leak but it is currently under control or stabilized.
- You are taking on water but can still make headway toward a harbor.
- you need to alert nearby vessels to stand by in case your situation worsens.
Using Marine VHF Properly
When broadcasting your distress, use Channel 16 and follow the standard maritime format:
- “MAYDAY, MAYDAY, MAYDAY” (or Pan-Pan).
- Station Name/Call Sign: Your boat’s name.
- Location: Use GPS coordinates or distance/bearing from a known landmark.
- Nature of Distress: “Taking on water through a failed through-hull.”
- Number of Souls: How many people are on board.
- Vessel Description: Color, length, and type.
Activating an EPIRB
If the situation is deteriorating rapidly and you are out of VHF range (typically more than 20 miles offshore), activate your EPIRB (Emergency Position Indicating Radio Beacon). This sends a satellite signal to search and rescue authorities with your exact location. Once activated, do not turn it off until you are rescued.
Response Strategy Based on Severity
Your tactical response must scale with the speed of the rising water. Assessing the severity of the situation allows you to prioritize vessel salvage or life-saving measures.
Slow and Controlled Leak
In this scenario, your bilge pumps are successfully removing water faster than it enters.
- The Goal: Monitor and Maintain.
- Actions: Keep a crew member on “bilge watch” to ensure the pumps don’t clog with debris. Head toward the nearest port immediately, even if the situation feels stable. A slow leak can rapidly accelerate if the hull is under stress from waves.
Significant but Stabilized Water Ingress
Here, the water has reached the floorboards, and your pumps are barely keeping up. You have found the source and applied a temporary patch, but the seal is not perfect.
- The Goal: Reduce Pressure.
- Actions: Consider the “Pan-Pan” call. If the leak is on one side, shift weight or change tack to lift that part of the hull higher out of the water. Ensure all crew members are wearing life jackets and that the ditch bag is on deck and ready.
Uncontrollable Flooding
This is a worst-case scenario where the water continues to rise despite all efforts. You must shift from “Save the Ship” to “Save the Souls.”
- The Goal: Safe Abandonment.
- Prepare Life Raft: Deploy the raft but keep it tethered to the boat. Do not board it until the boat is clearly going under; the boat is easier for rescuers to spot than a small raft.
- Gather Safety Equipment: Grab the EPIRB, handheld VHF, flares, and fresh water.
- Prepare for Possible Abandonment: Ensure everyone is in life jackets and, if available, immersion suits. Stay with the vessel as long as it is safe to do so, but be ready to step “up” into the life raft as the deck submerges.
Special Considerations by Boat Type
Not all vessels respond to water ingress the same way. The physics of your specific hull type will dictate how you manage the breach and where you should look first for structural failure.
Sailboats
Sailboats face unique hydro-mechanical pressures due to their ballast and rigging.
- Keel Stress: A heavy grounding or structural fatigue can cause “keel smile” (cracks where the keel meets the hull). If the keel bolts are compromised, the leak can be massive and lead to a catastrophic loss of stability.
- Heel Angle and Water Pressure: You can use the boat’s design to your advantage. If you have a breach on the port side, tacking so the boat heels to starboard can often lift the hole completely out of the water, stopping the ingress instantly while you apply a patch.
Powerboats
Powerboats typically carry heavier engines and move at higher speeds, which changes the dynamics of a breach.
- Prop Shaft Seals: Because powerboats often have high-RPM shafts, a failed packing gland or dripless seal can spray water at high pressure. If the seal fails completely, the volume of water entering through a 2-inch shaft log can overwhelm standard pumps in minutes.
- Planing Hull Damage: If you have a breach in the bottom of a planing hull, increasing speed can sometimes create a “venturi effect,” drawing water out of the boat. However, this is a dangerous gamble; if you slow down or hit a wave wrong, the sudden surge of water can swamp the vessel.
RIBs (Rigid Inflatable Boats)
RIBs are often considered “unsinkable” because of their inflatable tubes, but they are not immune to trouble.
- Buoyancy Chambers: Even if the fiberglass or aluminum hull is completely flooded, the inflated tubes (sponsons) should keep the vessel afloat. The danger occurs if a collision damages both the hull and the air chambers simultaneously.
- Structural vs. Tube Damage: If the hull is breached but the tubes are intact, your main priority is protecting the console electronics and the engine. If the tubes are punctured, the boat loses its primary stability and can flip or submerge much faster than a standard hard-sided boat.
Prevention: How to Reduce the Risk of a Hull Breach
The best way to survive a maritime emergency is to ensure it never happens. A proactive maintenance schedule is your primary defense against a catastrophic failure at sea. Following these steps will help you prevent boat taking on water scenarios caused by mechanical neglect.
Inspect Through-Hull Fittings Regularly
Every hole in your boat below the waterline is a potential point of failure. During your pre-season inspection and every time the boat is hauled out, check for:
- Corrosion or Electrolysis: Green “fuzz” (verdigris) or pinkish discoloration on bronze fittings can indicate metal fatigue.
- Hose Integrity: Ensure hoses are double-clamped with stainless steel T-bolt clamps. Look for “checking” or cracks in the rubber.
Maintain Seacocks and Valves
A seacock is useless if it is frozen in the open position during an emergency.
- Exercise the Valves: At least once a month, turn every seacock off and on to ensure it moves freely.
- Lubrication: Use marine-grade grease to keep the internal ball or cone moving smoothly.
- Accessibility: Ensure you can reach every valve quickly without having to dismantle furniture or move heavy gear.
Check Shaft Seals and Rudder Posts
These dynamic seals are under constant friction.
- Dripless Seals: Inspect the rubber bellows for any signs of wear or heat damage.
- Traditional Packing Glands: Ensure they are dripping at the correct rate (usually one drop every few seconds while the shaft is spinning). If they are completely dry, they may overheat and fail.
- Rudder Bearings: Check for excessive “play” or wobbling, which can stress the housing and lead to a breach.

Test Bilge Pumps Frequently
Never assume your pumps are working just because the light on the panel is off.
- Manual Trigger: Lift the float switch manually to ensure the pump engages and actually moves water.
- Clear Debris: Hair, fish scales, and wood shavings can clog an impeller. Keep your bilge “hospital clean” to prevent pump failure when you need it most.
- Backup Power: Ensure your secondary high-capacity pump is wired to a separate battery circuit if possible.
Train Your Crew
In a crisis, the skipper cannot be everywhere.
- The “Plug Walk”: Show every regular passenger where the through-hulls are located and where the wooden plugs are stored.
- Drills: Run a “mock leak” drill where crew members have to locate a specific valve and simulate the steps of sending a distress call.
Common Mistakes to Avoid
In the heat of an emergency, human error is often more dangerous than the water itself. Avoid these common pitfalls to give your vessel and crew the best chance of survival.
Underestimating the Leak
A common mistake is assuming that because the water is rising slowly, the situation is “fine.” A small leak can suddenly expand under the pressure of hull flex or increased boat speed. Never ignore water in the bilge—treat every unexplained gallon as a potential catastrophe until the source is identified and secured.
Delaying a Distress Call
Many skippers hesitate to call for help because they are embarrassed or afraid of the cost of salvage. Waiting until the batteries are submerged and the radio is dead is a fatal error. It is far better to cancel a Pan-Pan once the leak is plugged than to attempt a Mayday when your electronics have already shorted out.
Failing to Carry Wooden Plugs
It is shocking how many boats hit the water without a simple set of tapered softwood plugs. Relying on improvised rags or duct tape for a failed through-hull is a gamble you will likely lose. These plugs are inexpensive, take up almost no space, and are the most effective tool ever invented for stopping a localized breach.
Poor Crew Communication
If the skipper is the only person who knows where the pumps are or how to use the VHF, the boat is at risk. In a hull breach scenario, the skipper is often busy in the bilge. If the crew hasn’t been briefed, they may panic or fail to perform essential tasks like gathering life jackets or monitoring the radio.
Ignoring Regular Maintenance
Most “accidental” hull breaches are actually the result of long-term neglect. A cracked hose or a corroded seacock doesn’t happen overnight; it happens over seasons of being ignored. Maintenance is not just about keeping the boat pretty—it is about ensuring the hull remains a watertight barrier between you and the sea.
Essential Equipment to Carry On Board
Preparation is the difference between a controlled repair and a forced abandonment. Use the following checklist to ensure your vessel is equipped to handle a hull breach at sea.
Emergency Response Checklist
| Item | Purpose |
| Electric Bilge Pump | Your first line of defense; ensures high-volume water removal. |
| Manual Bilge Pump | Critical backup for when electrical systems short out or batteries fail. |
| Wooden Tapered Plugs | Specifically sized to plug failed through-hulls or broken hoses. |
| Hammer | Necessary to drive wooden plugs or wedges securely into a breach. |
| Epoxy Repair Kit | Underwater-curing putty to seal cracks and holes in the hull laminate. |
| Buckets (Heavy Duty) | Surprisingly effective for “high-speed” manual bailing in extreme flooding. |
| Marine VHF Radio | Fixed and handheld versions for issuing Mayday or Pan-Pan calls. |
| Life Jackets (PFDs) | Must be accessible and worn immediately by all crew during an emergency. |
| Emergency Beacon (EPIRB/PLB) | Your satellite lifeline to search and rescue if you are out of radio range. |
Pro Tip: Keep your wooden plugs tied to the specific through-hull they are meant to fit. In a dark, flooding engine room, you don’t want to be searching through a junk drawer for the right size.
Conclusion
A hull breach is a life-altering test of preparation. By staying calm, locating the source, and acting decisively with the right tools, you can transform a potential tragedy into a manageable recovery. Never hesitate to call for help early and maintain your vessel with rigor. On the water, your safety depends on the work you do before leaving the dock. Stay vigilant, stay equipped, and stay afloat.